Review: Glamour Grit

glamour grit1

What can bring more joy than opening a tub of body scrub and being greeted

with the scent that can only be described as holiday … and a

miniature spoon?

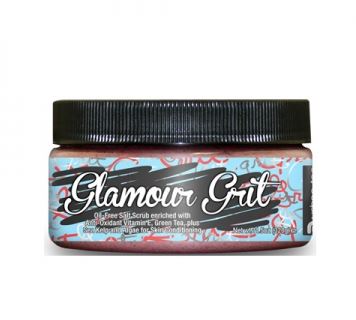
Urban Tan’s Glamour Grit scrub is an all over exfoliator that removes

any dead skin and toxins from the pores and rejuvenates the skin to give a fresh faced look and feel.

However, on using the scrub – admittedly on my face too – I found it was slightly too abrasive for me with sensitive skin, so avoid using on

delicate areas such as the face.

Another pointer – the scrub is to be rubbed into dry or damp skin before being washed off thoroughly after so do prepare your surroundings, you may even want to apply the product in the shower without the water running so it doesn’t make an orangey sandy mess.

Now, back to the actual product. The grit with its White Barbados grapefruit scent is paraben free, oil-free, gluten free (just in case the smell tempts you to eat it!) 100% vegan and cruelty free, so this product truly is natural; from the environment and for the environment. It contains the wonderful ingredients Sea Kelp and Algae to condition your skin. Plus Anti-Oxidant Vitamin E to fight free radical damage

I would advise everyone to alternate days you use the Glamour Grit so as not to irritate the skin too much.
For only £14.99 the 320g tub will last for over two months.

The range also includes self-tanners, which makes the perfect pre-beach body ready beauty combo for the upcoming summer months, but remember exfoliate first, then tan.

M x

Poolside Pubes

hair removal

We have seen the last of our summer holiday season; with the last few days of the summer holidays dwindling before the back to school September sadness. But for women this season has been the hardest few months to maintain your beauty regime hair wise. Every female has no doubt suffered at the hands of a wax strip, pair of tweezers or thread, primping and prepping themselves prior to their holiday to ensure not a stray hair is in sight.

Miley Cyrus flaunted a hirsute underarm fighting for her feminist belief, she even dyed it red to attract even more attention and in an attempt to rid the taboo and stigma around body hair. Other a- listers such as Julia Roberts did the same but Miley has swiftly removed the hair.

But, my point is why are women so hair conscious, especially on holiday, and men are not? Men can lay sprawled out on a sun lounger in their budgie smugglers with pubes awry, their “snail trail” obviously protruding and even an immensely hairy back (admittedly not all men), whilst there is pressure from society and the media for women to have to endure hair removal at a cost prior to their holidays and maintain a trim body hair. But why?

Pubes by the poolside are not the done nor seen thing for women. Society and the media have pushed us to believe that god help you if you did let your bush loose and visible to all when sunbathing. So, every year and every holiday season females venture to their trusty beauticians to opt for a hair removal of their underarms, eyebrows, legs and nether regions all in preparation for their hols, to save the hassle of shaving, but also, to spare the embarrassment of others seeing you bare all with all your hairs and graces awry. This does not necessarily mean that everything goes but every female will tame their hair for their holidays in some shape or form: whether it’s your DIY hair removal wax strips, shaving, threading, laser treatment, waxing and all the playful shapes you can possibly imagine from bald eagle, to Brazilian to a simple neat tidy shape up, a landing strip – you name it there’s a term for the design you want – but there is no denying that hair removal is top of the to do list for every female prior to their holiday.

Why is there such a stigma around pubic hair? I for one am not hair’s biggest fan – hair in general – I am terrible with with the head on my hair in terms of styling it (my limits stretch to a normal classic plait and even that isn’t the nearest), my eyebrows have remained the same shape for years and require little plucking, however I am an advocate of smooth hair free legs and equally neat and tidy bikini area, but the expense, the pressure and the demand to maintain such neatness is something men will not know. I have never gone on holiday without a bikini wax, nor will I, but why I won’t dare to is something engrained in me. But why? And by who? Booking my beauty appointment is something I don’t think twice about doing before a holiday, because they (beauticians) say it lasts longer than waxing, which it does and it is better for you (arguably), but I do enjoy the carefree hair free holiday outcome. But it doesn’t actually last the entire summer, and prior to your wax works session you fear wearing shorts because of how bad “down there” could be and you don’t want to run the risk of others getting a glimpse. Yet men do not ever have this fear.

Some may deem the hair free female as abiding to misogyny and the unrealistic perspective of women projected on men of glamour models with the perfectly proportioned body, who have neat or hair-free nether regions. But the fur-free feline can also be a nod to feminism (arguably- well I’d like tho think so), women are in charge of our bodies, and despite the media’s views on how a woman should be and look like, ultimately us women make the decision, and I take pride in primping myself and I honestly do feel empowered, and more confident when hair free.

I have put it down to society and the pressures on women to have the perfect “porn star designer vagina” that has pressured women into going to the expense and pain of hair removal that now a tamed and trimmed downstairs is in fact expected.

Will this stigma ever go? If women stop maintaining their hair, pubic hair in particular, what will happen? And why can men get away with more grotesque hairy bodies?

M x

Ombré Nails

Ombré

We have had ombré hair, we have even dabbled with ombré lips but now an even simpler ombré experiment to trial is ombré nails.
The definition for ‘Ombré’  is: “having tones of colour that shade into each other, graduating from light to dark.”
Simply, but effective AND fashionable!
Whether you fancy a rocket ice lolly multicoloured ombré nail, a sunset shaded nail or even wish to stick to one colour and have that single hue in ombré tone, there will be a shade to suit everyone- I promise. Ombre
You can experiment in various ways with colours, with various hues, and with the direction of ombré; you can lighten the nail towards the tip of your nail, to the cuticle, outwards, to one side, and even ombré inwards.
How to ombré:
4
1) Pick the colours you wish to use for your nail art, whether that is a deep red, then various lighter hues of that shade, or whether that is a deep red, coral. Orange, peach, yellow and a slight touch of white for the sunset look, and include a clear base coat and gel finish for after.
2) File, and trim your nails to the shape you prefer, and slightly push down the cuticles to accentuate the length of your tallens.
3) Apply one layer of a nude or clear base coat, and wait for that to dry.  This acts as a blank converse and permits a smooth application of the nail varnish.
4). Work from light to dark, to prevent the darker shades bleeding into other nail varnishes, and to ensure that you do achieve a more distinctive ombré effect by incorporating the lighter contrasting colour. So paint your whole nail in the lighter colour (for the ombré effect toward the tip of the nail)
Continue to apply a layer of each coloured nail varnish but stopping a bit shorter than before to achieve the gradient.
TIP: if your ombré nail is looking more staggered and less blended, lightly dab a cotton bud into nail varnish remover so the cotton doesn’t catch and smudge onto your nail, and simply blend the colours together.
5). Once all the colours have been applied, and the darkest colour reaches your cuticle, wait for your nails to dry.
6). Once they are dry, apply the clear gel finish effect. And voila!
For those who have a steadier hand and less patience, use the corner of the nail brush and instead of painting your entire nail each time, lightly dab each coloured varnish on your nail in the direction you wish to go, softly flicking the brush away and continue to lightly dab and continue this process for each consecutive shade after that, which is another technique will also achieve an ombré look.  However, by lightly dotting your nails to cover the sections of the nail you want in that colour you may result in areas of your nails appearing like little blobs, and it could leave a less smoother finish.
BUT, for an even simpler technique…
 5
Follow steps 1 and 2 (above), once you have selected the colours you wish to use, and the order, cut a small rectangular segment of sponge and paint it in the order and shape of your ombré effect, then quickly apply that onto your nail like a transfer.  Use a cotton bud dipped in nail varnish remover to remove any excess varnish around your nail.  Apply the gel finish and simply easy (if perhaps slightly messy) slick ombré application.
Experiment away!
Get Zoe Kravitz’s Beauty Look

zoe kravitz 2

Zoe Kravitz at the Elle Style Awards flaunted a gothic glam beauty look with her long braided locks and dark shaded eye makeup. It is safe to say that Zoe has gone from a timid teen to a wild glam rockstar, following closely in her father’s footsteps (minus the exposing catastrophe).

zoe kravitz3 zoe kravitz

One thing we can always associate with Zoe is that her make up is always fairly understated, with her emphasis beauty wise on either the eyes, or lips. By only focusing on one area acts to achieve an understated look, fitting for her laid back rockstar air she has.

How do you get Zoe’s laid back glam rock look?

Focus mainly on the eyes.

  • Sleek black eyeliner.zoe kravitz 1With a steady hand use Colorsport Rapid Lash Gro eyeliner and make one sweeping stroke across the edge of your top eyelid, as close to your lashes as possible, with the thickness of the line depending on your personal preference. This eyeliner is doubly effective, not only does it assist the growth of your eyelashes but it also acts as a very efficient black liquid eyeliner with a fine brush to help create the perfect line ONLY on the top lid.
  • Soft kohl eyeliner.

    zoe kravits 4zoe kravitz 3

With the soft eye pencil Rimmel’s Soft Kohl Eyeliner in Stormy Grey sketchily trace under the lower lid, and using the soft sponge to smudge it so as not to create a sharp and drastic line effect like the top edge, this works as a smoky smudge effect, and also creates the rockstar look of ‘I’m wearing last night’s make up’ look. Simply smudge the soft kohl pencil from half way of your lower lid out to the very edge and a few millimetres outside of your eye, to accentuate the eye area. The risk with wearing eyeliner on the top and bottom eyelids is that it gives the impression of small squinting eyes, which we do not want, and Zoe does not have, therefore a softer eyeliner approach to the lower lid will draw a contrast to the whiteness in your eyes and the extension of the line to the outer edge of your eyes will create the illusion of bigger eyes.

  • Pearlescent eyeshadow.

zoe revlon bonezoe bone

Use either a white eyeliner or a pearlescent shaded eyeshadow, such as Revlon’s Colour stay eyeshadow in Bone or Oyster. With a fine brush lightly trace the outer edge of your top eyeliner (you may need to re-apply the black eyeliner on the top lid), and follow the line all across the eye, adding more eyeshadow in the inner corner of the eye and dragging out to the outer eye and blending slightly upwards so as not to create too harsh a white line. By contrasting the black block eyeliner with the light eyeshadow creates a bolder and sharper eyeliner, and acts to highlight the eye area so it is not too gothic. Splash on a few lashings of mascara and you are ready to go.

Extra Zoe Kravitz beauty tips:

Zoe Kravitz appears to go au natural and never obviously wears foundation or face products other than eye or lip products, due to her caramel complexion.

But for those who may feel bare without any foundation or blusher, lightly dust a bronzer, try Rimmel’s Sun-bronze for a light tan dusting, to emulate the actress’s complexion.

To highlight your features like Zoe, dot Benefit’s Sun beam down your nose, a little across your cheekbones and above your brow, to create an ‘A’ shape, and blend in.zoe kravitz sun beam This will highlight your features and streamline your face too. It will also aid the natural sunkissed complexion. However, put the highlighter on and wait for it to settle into your pores before applying the bronzer.

Lastly, your lips. Zoe has opted for nude au natural lips, so you can simply dab a nourishing lip balm onto your lips with a beauty essential such as Carmex, or try a nude matte finish lipstick from Mac’s new Matte Lipstick Collection in a brown/nude shade, try The Matte Lip in ‘Whirl’. For not such an obvious application, apply the lipstick to your finger first, then lightly dab along your lips until you are happy that you have enough coverage, then blot.

zoe mac zoe mac 2

M x

FKA TWIGS: Formerly Known As… Our New Beauty-inspo

FKA TwigsSinger songwriter and R Patz’s fiance FKA Twigs is renowned for her bold beauty and signature slicked down baby hair in swirly patterns, which is a massive throwback to the Black history Beauty days (and ignites a whiff of nostalgia for me, reminding me of Christina Aguilera and Lil Kim’s hit ‘Can’t Hold Us Down’ music vid and Chilli from TLC -slight tangent).

FKA twigsThe musician born Tahliah Debrett Barnett who has adopted her nickname ‘The Twig’, because of her cracking joints as her musical stage name, frequently experiments with make-up and is the front line of new beauty trends and facial body art. Her IMG_3025Latina/Jamaican descent giving her the perfect bronzed complexion, permits her to pull off any beauty trend possible.

My favourite FKA Twigs is the look on her Genius album cover (right),  which is suitable for the final summer weeks ahead and adaptable to suit all skin tones is her blazon beauty. This look is a signature pillar box red lipstick, a natural bronzed complexion, with burnt amber eyeshadow, classic black simplistic mascara and a sleek eyebrow.

The products you need to achieve the FKA Twigs beauty look:

1). The red lip

Lipsticklipstick colour

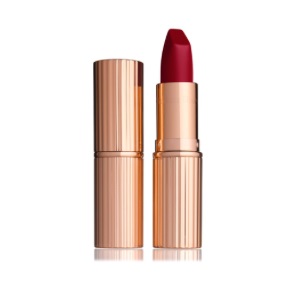
No make-up bag is complete with a classic rouge. Charlotte Tilbury’s ‘Red Carpet Red’ Matte Revolution Lipstick is the one for you. The matte effect enables the colour to last longer, yet it is not too matte that the colour pigment seeps into the cracks of dry lips. To get the full ‘POW’ of any red, cover your lips with a concealer or foundation to match your skin tone, which will act as a blank canvas to apply the colour on top.

2) The burnt orange eyeshadow.

Nars

FKA Twigs opts for an all over eyelid burnt orange/amber shade that is slightly metallic. This hue is suitable for the sun kissed skin we are all sporting from these summer days, therefore it is the perfect eyeshadow shade for now. Opt for Nars’ Meditaranee Duo Eyeshadow, use the paler shade for directly onto your eyebrow bone, and apply the amber metallic shade over your eyelid as well as in the corner of your eye too. This will act as a highlighter and give that little ‘glint’ to your eye. Follow this with a few lashings of an ultra black lash lengthening mascara (but not so it is clumpy) to embody your inner FKA Twigs.

3). The sleek eyebrow.

Maybelline Brow Drama Brow Mascara Soft Brown Maybelline Great Lash Washable Mascara in Clear

We have seen a huge surge in large bushy eyebrows, so for those who are blessed with fuller brows, and even those who may have slightly over plucked this beauty tip will help you (minus the need to draw on your eyebrows to create a fuller brow). Simply get a clear eyebrow brush (Maybelline Brow Drama Brow Mascara in Soft brown) or even a clear mascara (Maybelline Great Lash Mascara in Clear) and lightly brush it over your brows with an upward movement to push your eyebrow hairs upwards. This immediately gives the impression of bigger fuller brows. This is perfect for summer as it is not always easy to maintain a symmetrical pencilled brow every day in sweltering heat, so this beauty tip is fully sweat proof and fully effective.

M x

Long Live Lippy 💄

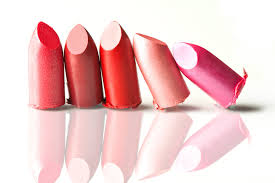
lipsticksIt’s National Lipstick Day, so why the heck not blog about my favourite lipsticks?

Despite having only a few hours left of this national day, I am going to celebrate it in it’s last few hours, nevertheless.
Lipsticks are my favourite beauty product. I have to say that I own about forty, currently, and I would not like to know how many ex- lipsticks I have owned, worn to death, and binned.

Lipsticks: ranging in texture, whether matte, satin, smooth, glossy finish, a rainbow of colours, brands, and effects. From lip stains to give the impression of lipstick, to lip powders, lip liners, lipsticks come in a varied abundance.
So, I am going to pay tribute to my three favourite lipsticks and lip products on their national day. My three favourite lipsticks and lip products are:

MAC 'Faux' Satin Lipstick

MAC ‘Faux’ Satin Lipstick

1). MAC “faux” satin lipstick. My everyday reliable lipstick, it goes with every outfit and adds a soft pinky/nude shade to my lips. It lasts long, but the satin base ensures that it is not a lipstick that gets clogged into any odd dry cracks and crevices you may not realise you have. Aside from the chocolatey smell of the lipstick, the smooth application, its durability, and the fantastic colour which makes this lipstick wearable with any outfit and any occasion; it is not too “dolly” pink nor too nude that you lose definition to your lips, is why ‘Faux’ is my number one lipstick. This lipstick is neutral enough to be simple yet classy, but it has enough colour to distinguish that you are wearing make up, perfect balance- right?

Bobbi Brown Number 9

Bobbi Brown Number 9

2). Bobby Brown “9 peachy” sheer lip colour. My summer fave. This lipstick is light, bright, and a subtle pop of coral colour. This lipstick with its sheer base keeps your lips moisturised and slightly glossy looking, which is perfect for summer days to add a bit of glam by the poolside.

lips 3

3). Benefit’s Benetint. This is my ultimate long lasting beauty product in my make up bag. It is both a blusher and lip stain. Ideal right? The 2-in-1 product is a red liquid in a nail varnish bottle, and although that seems garish to some, it isn’t as bad as it seems. For blusher, simply apply three dots along your cheekbone and rub quickly to blend, which creates a long lasting rosy cheek complexion. For lip stain simply dot a few drops onto your lips and blend. Super simple. And you can easily control the intensity of the colour lipstick. Simply apply more dots after you have blended them in of the Benetint to heighten the intensity of your red colour; if you want a subtle pink hue to your lips, only use a few drops, but if you are opting for a stronger red then continue this process a few more times. The usp for Benetint is that it creates a natural red/ pink hue to your lips, and does not give the effect of a clogged red lipstick that is too bold, it does not get caug in your teeth, and it lasts the entire day . If you wish you can apply a top coat of another lipstick but Benetint is reliable enough on its own. This product also lasts for numerous years! So it is great value for money.

Kiko's Lip Precision Liner

Kiko’s Lip Precision Liner

4). This one doesn’t quite count as a lip stick but it is ALWAYS worth having a lip liner in your make up bag. My personal favourite is Kiko’s precision lip pencil in 310. For me this is the perfect shade as I can easily blend it wi other lip shades, it complements lipsticks well, but can also work as a stand alone lipstick too. I have converted to lip liners, and this is great to emphasise your lips, to enhance the size, and to better define the contours of your smackers, but it also is extremely beneficial to stop lipsticks from leaking, as they can do.
TIP: to get the full shade of your lipstick, it is best to lightly dab on to your lips a nude foundation or concealer, which acts as a blank canvas to project the true colour of your lipstick.
TIP 2: (I am spoiling you!) if you have a normal, or satin based lipstick (or any base except matte) but you wish to turn that lipstick into a matte effect, simply apply the lipstick colour as you would normally, but then lightly dust a concealer powder or even powder blusher or bronzer over the lips. This acts to absorb the moisture from the lipstick and create the matte effect, no one would know.

Pucker up!

M x

Lay Back This Summer with Lavender Inspired Beauty

lavender

Summertime is all about chillaxing in the sun, by a pool, in your garden, anywhere. Simply grab a good book, a magazine, your ipod, a few bevvies and let the angst of your working day be left astray.

Whilst summertime is the holiday season and the peak time for relaxation, there are additional ways to be stress-free if you can’t manage to get away, and it is all with the help of one little plant – Lavender.

Whether you wish to include a bed of lavender in your garden, or would rather add the sweet gentle woody lavender scented essential oils to your bath, there is something for everyone to ensure we are all relaxed this season.

Lavender is said to be the beauty saviour, so here are a few lavender must haves to enhance your relaxation and downtime.

  • Jo Malone Lavender and Lovage Scented Candle

jo malone

  • The Classic Lavender Essential Oil to dab on your pillow or add to your bath

lavender 2

  • Lavender Palm Eau de Parfum by Tom Ford

tom ford

lavender badger

neals yard

However, if you would rather opt for lavender inspired beauty products, then check out the following:

  •  Revlon’s perfumerie scented nail polish in lavender

revlon

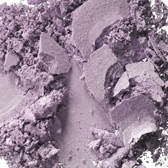
mac

  • Clinique Colour Surge Butter Shine Lipstick in ‘Waterviolet’

clinique

Although you may feel you may look slightly whacky with a purple eyeshadow, you won’t.  Simply apply the lipstick (which is a sheer light finish and not matte) and blend the eyeshadow sparingly to incorporate the lavender hue in your beauty regime.  Lavender shades will add a softness to your complexion, and will also act as a highlighter due to the soft hue of the colour.

M x

Nail-spiration: Wimbledon Whites

heather watson

As we all amble about in our flip flops and Birkenstock over the hot summer days, are tootsies are inevitably going to be on show, which is why our finger nails and toe nails are the beauty area to perfect this summer.

For a lot of people the conventional nail polish palette ranges from bright dolly pink varnishes, to summery corals and reds, and I for one am guilty of following this trend. Although occasionally you may venture for a pastel shade or maybe even a blood orange red, this year’s Wimbledon has given us some nailspiration. Who would have thought it?

Wimbledon is associated with pure crisp white. So, if you’re mad about the tennis this summer then show your support through your fingertips by painting your nails white. You can opt for all white nail polish such as Barry M’s Matt White shade to simply coat your nails with. white This simple nail look will enhance any sun tan, and create a bold and crisp modern look. But, for those who wish to include the Wimbledon whites with your nail beauty but in a subtler way, then imply add white tips to a nude nail for a French manicure.

If you have been watching the tennis, you may have spotted Great Britain’s Heather Watson with her metallic nails. If not, then take a look at her performance against Serena Williams yesterday. The silver chrome finish against the white uniform really stood out, and is a simple yet stylish summer nail to trial. Get your hands on Models Own’s Chrome Silver, OPI’s silver finish polish, or even silver foil nail wraps to achieve this look, it’s perfect for the festival season and will bring some glam to the poolside. If you are feeling REALLY inventive, then why not experiment with patterns, whether it is half a nail in the silver chrome and half in white for super summery sassy nails.

opi metallic nails metallic nails

Both colours are suitable for finger tips and toe nails, they will enhance any skin tone giving the appearance of a darker tan without opting for the bottle, and these light bright colours scream ‘fun in the sun’.

M x

Summer at your Fingertips!

It’s the beginning of June and the summer months have officially arrived. HIP HIP HURRAY! During the summer months there is more emphasis on hair and nails, rather than make up as we are all opting for the au natural, sun kissed look (whether from a bottle or the genuine Amalfi coast glow).

The best summer nails to try this season are light, cool pastel shades that turn your tan up three notches higher, and bright and bold nails that make your nails POP. However, I don’t simply mean paint your nails in one plain colour, it is summer and that means that it is time to get experimental. So, to have super fun beauty at your fingertips it is time to get a bit creative and arty with your nails.

Here are three of this season’s best summer nails:

photo 2

1). For those of you who may not be so steady with your hands, this option is best for you. Paint your nails with a nude base coat, here we have used OPI’s Samoan Sand, and apply two coats. Once this has nearly dried loosely brush on, in any direction, Nailberry ‘In love’ or a brighter complimentary polish to create a fun, quirky mani. This style is quick and easy to do, yet the contrast between the soft hue and the brighter polish transforms a simple manicure into a quirky must have beauty style. Do not worry if you get slightly messy or if the nail polish smudges as that is the style. Try this technique with various colours, you can stick to two shades of one colour, or two contrasting colours… go wild!

photo 1

2) If you feel like being slightly more experimental, then this nail art is for you. Collate your favourite few nail polishes; you can range from three to several, picking one colour as your base coat and simply applying the other colours in spots to your nails in no particular order. If you choose to opt for fewer colours then you can vary the size of the dots or the number of them; whether you want fewer but larger splodges, or lots of smaller dots. With this nail art there is no right or wrong way to create it, so experiment as much as you wish. If you find it hard to pick which colours to use and fear overloading your nails with clashing colours then try stick with Essie’s pastel shades that are a heavenly pastel combination; Essie’s ‘Blanc’, ‘Bikini so Teeny’, ‘Mint Candy Apple’, ‘Muchi Muchi’.

photo 3

3). For those of you with a sturdier hand try adding more intricate details to your nails, such as ice cream droplets. This design is perfect for summer; not only are we buying ice creams by the dozen and eating them daily throughout the summer months, we are opting for ice lolly style shoes, phone cases, the lot, so why not have ice lolly style nails to follow suit? For this style you will need a mix of soft and bright polishes; Ciaté’s Ice Cream Collection £22 is best for this. As always pick one colour as your base, however, you do not have to stick to the same colours for each nail, so vary them; have a base coat of a pale pink then detail the dripping pattern with a strawberry sauce type polish, then your next nail could replicate chocolate chip and use a mint green and white varnish, a bright lemon sorbet with an even brighter blue bubble-gum sauce coloured polish, and so on until you have an ice cream parlour on your fingertips. Do not be shy, as the more daring and outrageous you go, the better your nails will look. If you really are feeling brave then why not add some ‘sprinkles’ in the form of bobble beads?

Capture

Whichever arty summer nails you trial for this season, you will be sure to draw attention (in a good way).

I want to see your wacky nail art for this summer!

M x

Crazy for Curls

index

Capture

Let’s not beat around the bush – pun intended- we are all familiar with the film Curly Sue, an archetypal character that all young curly haired girls would associate themselves with purely on their hair type, but this year’s Met Gala and Cannes Film Festival proves that the ’50s Hollywood deep set sleek waves are back.

images

As Wedding season is approaching, as are a lot of Summer Balls, there is only one hairdo for you.  Channel your inner Jessica Rabbit (or the more preferable comparison Blake Lively) to get the deep set waves like Amal Clooney and Charlize Theron at the Met Gala, and Selma Hayek at the Cannes Film Festival with their sleek deep set waves that all follow the glossy neat wave throughout their locks, which will instantly give your friends major hair envy.

ghd

To create this sleek style use GHD Curling wand and twist small sections of your hair around the tong all following the same direction, so that your entire head is laden with ringlets.  Yes, this may seem crazy but this is GHD Styling expert’s top tip- there is a method in what seems like madness.  Once your hair has completely been curled you then brush out the curls, add a light hair serum (which is optional depending on how sleek you want your style), this will loosen your curls but enable them to collect in the wave-like formation.  Sweep your hair all over to one side and voila…. red carpet ready!

selmachar GetAttachment

However, it is the summer, and we females do not always want to be swamped by hair.  So, if that is the case, you can still channel this 50s uber glamorous style but opt for an up do; it is still keeping with the trend but adding a twist, which is what the twenty first century is about, right?  Look to Charlize Theron who did just that, she has the sleek deep set 50’s waves but loosely tie up your hair in a low loose bun at the lower base of the back of your head.  beyonce-met-gala-2015-3-e1430854848526Or look to the one and only Queen B who turned heads at this year’s Met Gala (minus the lift wars) and once your hair is fully tonged and brushed out. Collect your hair in a tight, slicked back ponytail, this way you still feel like a fierce female yet remaining col in the summer heat when all hair types have a tendency to frizz.

rollersFor an even looser curl, brush out the curls a tad more or opt for TRESemme’s Heated rollers, which you can leave in for as long as you want and opt for big or smaller rollers depending on how tight you want your curl, also what can determine the tightness of your curl is how long you leave the rollers in for; for some with thick hair that has a tendency to make a hairstyle drop out quicker, then leave the rollers in for slightly longer, however if you have thin hair and only want loose curly waves, then leave in for a short time. Heated rollers still bring that fun glamorous bounce to your locks, but ensuring that they the curls are not just-so.

If however, you wish to opt for a day time curl then do as I do, and as your hair is drying leave it tied up quite tight in your towel to let it dry; you can be painting your fingernails, applying your make-up, simply reading your book and taking some down time just to let your hair dry, once your hair has dried they will have a loose yet natural looking curly wave.  To ensure that your curl doesn’t drop out during the day you can quickly whip your hair up in a tight bun held together with a crocodile clip, then once you let your luscious locks down and have that L’Oréal moment and you have everyone wishing they knew your curly hair secrets.

M x